Showing posts with label other crafts. Show all posts

Friday, July 1, 2016

I finished a crochet bag

Well I finished my first crochet bag, I am proud of how it looks. I love to crochet but I mostly make hat tams, items for my own head and for the first time I decided to create a bag, Pinterest inspired me after I learned to create granny squares on that website.

I used 1 or 2 skeins of beige colored yarn for the base of the bag and 6 different colors for the 8 granny squares.


Here you see the 8 loose squares, ready to sewing them together. I sewed the 2 squares together into a bag. I crochet the strap onto the bag without cutting off the yarn first.

Anyway, enough talking, here are the results:


Thursday, June 30, 2016

Embroidery me

Twenty years ago I was at school, asigned to embroider a landscape on a piece of fabric. It was 4"x 4" and I hated the job back then because it took ages before it finally was finished.
Back then, I embroideried mountains behind some hills with blue sky and clouds. I still have it somewhere in my house, when I find It I will take a picture of it and place it in this blog.

Now I have more patience with craftarts like embroidery. I surfed the web and stumbled upon a blog from craftsofallkinds. The lady behind the blog handstamped a card with a cat sitting on a brick will between the trees.


I thought to myself, I have to embroider that one day. It will be my first embroidery project after many years, the card that looks like a painting and it is so pretty.

So here is my atempt! I cant tell you much about the stitches I have used, I just started with it and I think it came out just fine :)

Thursday, July 26, 2012

Sewing Experience: Vouw Portemonnee

Vandaag heb ik aan 2 projectjes gewerkt. Twee minizakjes en een portemonnee.
De twee minizakjes zijn niet helemaal gelukt zoals ik het graag had gewild maar toch laat ik het resultaat zien.
Het minizakjes idee komt van HomemadeByNancy en de tutorial van SeeKateSew. Het zag er zoooo leuk ik, ik moest dat ook gewoon proberen en kroop weer achter de naaimachine ... het leek zo simpel maar brrr ... wat heb ik me vergist.


De flap is groter dan het zakje zelf en alles loopt nogal scheef. Er hoort nog een knoopje aan maar ik heb me de moeite bespaart. Ondanks dat ben ik op zoek gegaan naar nog meer naai project tutorials en vond een interessante op Modest Maven: een vouw portemonnee Een stuk ingewikkelder project leek het maar ben meteen aan de slag gegaan.... maar viel het wel mee! EN Ik kan eindelijk zeggen dat ik trots ben op  het resultaat :D De portemonnee bevat een vak voor papiergeld en vakjes voor bankpassen en is dicht te krijgen via een drukknoop of een gewone knoop.
Een link naar de tutorial is >>hier<< te vinden 


Ook hier hoort nog een knoopje aan maar dat volgt later. Dit portemonneetjee lijst ik in :D

Monday, July 23, 2012

Sewing experience: a third lined zippered pouch attempt

Ik ben maar weer eens achter de naaimachine gekropen. Dit naar aanleiding van de post van Homemade By Nancy waarin zij onder andere een genaaid minizakje laat zien. Via haar post kwam ik terecht bij SeeKateSew waarin zij in 1 van haar tutorials een nog betere tutorial heeft uitgewerkt over een zippered pouch / etui met rits en nog meer leuke creaties laat zien.

Vorig jaar deed ik al een poging maar was niet helemaal tevreden:
de bovenkant vond ik te bol en werken met een rits is een uitdaging!

Werken met rits vind ik nog steeds een uitdaging maar er zit nu meer vooruitgang in :)
Dit etuitje loopt in ieder geval een stuk rechter dank zij enkele essentiele tips uit de tutorial.


Saturday, April 30, 2011

My Eyeglasses cozy

It has been a while since I bought the book Sew Darn Cute from Jenny Ryan.
It's a lovely book with lots of fun beginners sewing projects.
I picked the eye glasses projects and will show you my steps.
Btw, this is not a tutorial..

1) I cut 1 rectangle of paper 19cm x 10cm for the exterior fabric nd for the lining fabric.


2)I wanted a padded cozy so I cut off 2 rectangles (19cm x 10cm) of polyfoam laminate flooring. This part wasn't mentioned in the book.

3) I cut off 4 cotton rectangles from an old curtain, 19cm x 10cm
4) I wanted a cozy with crochet flowers and handsewed them om the right side of 1 of the 4 rectangles.
5) This is how my sewing supply box looks likes .


6) sewing the flowers after ironing the rectangles...
7) I placed the exterior rectangles right side together and 1 polyfoam on top and sewed along three sides, leaving the top edge open.


8) I also sewed the lining -right sides together , 1 polyfoam rectangle on top sewing along three sides leaving the top open and turned right side out.


9) Then came the tricky part: I inserted the linig into the exterior of the cozy with right sides together, lining up the side seams, pinning the lining and the exterior together and tried to sew threw three layers -cotton - foam - cotton- leaving 5 cm open along one side for turning right side out.

10) I sewed the layers but couldnt turn the right side out, It was all too thick.


So I started over, made a 5 cm bigger cozy (19cm x 15cm) and watched how soreribsin made her own owl padded electronic device case.


Here is my own cozy:Instead of 1 opening in the liningpart on step 8 I left both sides (top and bottom) open. It's easier to turn the rigfht sides after the sewing part.


Next time I will try this project in the book again with fusible interfacing.


Friday, March 25, 2011

Crochet addiction

If I have the time, I crochet, for hours, mostly after work.
Crocheting relaxes me in a strange way :)

These are my crochet baskets:

It's a big and a smaller basket and I bought these at Ikea. They are a perfect storage for all the yarn and finished projects.

Here are some of my projects:
My mini basket with a flower


First stadium: dreadlock tam


The inside of the tam


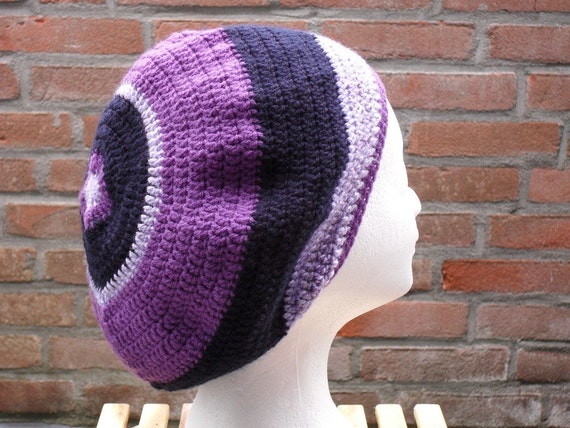
One of my other finished tams

That's it for today.

Thursday, March 24, 2011

Crafty storage

This is how I store my supplies and crafting results. I buy all my boxes in two shops in the Netherlands, for the Dutchies : Xenos & pipoos .. :D

In here I keep my inspiration :) And my supplies. I bought these boxes at Pipoos.

And here is a closer look


These boxes I bought at Xenos, all my resin creations are kept nicely on wax paper in these boxes.